Managing Cruise Control Campaigns
How to manage Cruise Control Campaigns in the Admin Portal
Table of Contents
About Cruise Control Campaigns
Managing and Enabling a Campaign
About Cruise Control Campaigns
Cruise Control Campaigns are system-generated, automated marketing campaigns that help get your members and customers back in the door more often. Once you set up and make a campaign active it will automatically send out messages and rewards to your customers. While rules are created by the system, there are still some aspects that you can modify and customize to your needs.
Available Campaigns
First Visit
A message will be sent to your member or customer after the first time they earn points at your organization or business. Generally, a member earns points by checking into the Rewards Kiosk.
Network
A message is sent to your member or customer if they have visited within 7 days after initial registration.
Growth
A message will be sent to your member or customer after every 3rd earning of points.
At Risk
A message will be sent to your member or customer if they have not checked in to the Rewards Kiosk in the past 30 days.
Lapsed
A message will be sent to your member or customer if they have not checked in to the Rewards Kiosk in the past 60, 90, and 120 days.
Lost
A message will be sent to your member or customer if they have not checked in to the Rewards Kiosk in the past 210 days.
Birthday
If a member or customer has provided their birthday, a message will be sent to your member or customer 3, 5, or 7 days before their birthday.
Managing and Enabling a Campaign
- Log in to the Admin Portal to access your account.
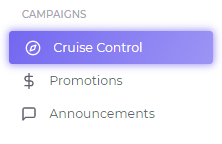
- On the lefthand side of the screen, under Campaigns, select Cruise Control to view and manage Active and Inactive campaigns.

- For the campaign you would like to manage, select Edit under Actions.

- Make any editable changes you would like to make to the promotion. For all promotions be sure to include the reward that will be sent out in the message to the customer as well as the expiration date of the reward.
- Set the Status to Inactive or Active.

- Select Save Changes.
